How to Build a Garden Box: Square Foot Gardening
It’s easy and inexpensive to get started with square-foot gardening. This is a fun and educational project for the whole family to enjoy (might also help your kids eat their vegetables, and make salad-making much easier). Square-foot gardening is a simple way to plan your garden and keep it organized. You can also look up, “List of Lawn Care Professionals Near Me” to find professional help for your garden.
Build the Base of the Box
You should be able to find all of the supplies you need at your local hardware store. These supplies are all inexpensive and easy to find.
- 4-foot 2×6 untreated lumber (4)
- 4-inch wood screws (12)
- Power drill
Start with the 2×6 boards for the box. On each board, measure ¾ inch in from the short end of the board, and make three evenly-spaced marks along this edge. Drill pilot holes on the marks for the screws. You only need to do this on one end of each board.
Lay the boards out on the ground in the shape of a square. Set them up so the pilot holes you drilled on each board are butted up against the edge of the board next to it. Insert 4-inch screws into the pilot holes and screw the boards together to form a square. Depending on the type of lumber you bought, your bed may not be perfectly level once you have assembled it. But don’t worry too much about that.
Install the Weed Barrier Cloth
The weed barrier cloth will line the bottom of your bed so that weeds don’t grow through it. For this step you need the following supplies:
- Weed barrier cloth
- Scissors
- Staple gun
Begin by unrolling the bolt of cloth and draping a length of the cloth to cover the box you built. This will help you to estimate the correct size to cut. Cut a length that is slightly bigger than the box.
Now you will need to staple the cloth to the bottom of the box. Begin by stapling the corners. Then pull the cloth taut and install more staples every few inches around the perimeter of the box.
Place the Box in Your Garden
Once the box is built and you’ve stapled on the weed barrier, it’s time to place it in your yard. If you are using more than one box for your vegetable garden, be sure to install them at least 24 inches apart from each other. You want to give your beds plenty of room for drainage.
Mix the Soil
For one box, you will need 8 cubic feet of soil. For the initial set-up of the box, you need soil composed of three materials. One-third of the soil should be compost, such as cow or mushroom compost. One-third will be vermiculite. This supplies minerals that absorb a lot of water. And a third of the soil will be peat moss. This also provides organics that absorb a lot of water.
An easy way to mix all of the materials is to dump them all out on a tarp. Then pick up the corners and edges of the tarp to mix all of the materials together. It takes a little muscle, but this is the easiest way to get everything mixed up. This 4 Gallon Backpack Sprayer for sale will be a great investment in your garden if you think hand pumps are annoying. It will save you time as it only needs to be charged in a short time and works well for about 10 hours.
Using a wheelbarrow, bring the mixed up garden soil bit by bit to your garden box. Once you lay down the first layer of dirt, water it generously with a garden hose. Repeat this same process layer by layer until your box is full. Make sure you water each layer liberally before laying down the next layer of soil.


Build the Grid
The next step is to build the grid that lays on top of the box and divides it into 16 square-foot sections. For the grid, you need the following supplies:
- 4-foot lattice strips (6)
- Machine bolts (9)
- Small nails or screws
- Power drill
- Hammer
Begin by drilling pilot holes in the lattice strips. Create three evenly-spaced marks on each lattice strip. The marks will be about a foot apart. Using a drill bit that is slightly larger in diameter than your machine bolts, drill holes on each mark. Each strip will have three holes, about a foot apart from each other.
Lay the lattice strips on top of your box to create the grid. First lay three strips horizontally on the box, a foot apart from each other. Then lay the next three strips vertically on top of the horizontal strips. Line up the pilot holes that you drilled, and simply drop the machine bolts into the holes to hold the grid in place. Finally secure the outside edges of the grid to the garden box with small nails or screws.
Build the Trellis
The supplies you need for the trellis are inexpensive, and they can be found at your local hardware store. Gather the following supplies:
- 2 rebars
- 5-foot conduit pipes (2)
- 4-foot conduit pipe (1)
- Corner joints (2)
- Garden trellis string
- Mallet
Choose the side where you want to build your trellis. Using your mallet, pound one of the rebars into the ground in the corner just outside your garden box, leaving about a foot sticking out of the ground. Repeat with the other rebar on the other corner of the box. Slide a 5-foot conduit pipe onto each piece of rebar. Put a corner joint on each conduit pipe, and then insert the 4-foot conduit pipe into the corner joints so it is parallel to the ground. Now you have your structure for the trellis, and it is time to attach the trellis string.
The trellis string is attached just by tying knots. First, tie the knots across the 4-foot bar at the top of the trellis. Then trim your trellis string on each side. Finally, tie knots to secure it to the sides of the trellis.
Watch Your Garden Grow
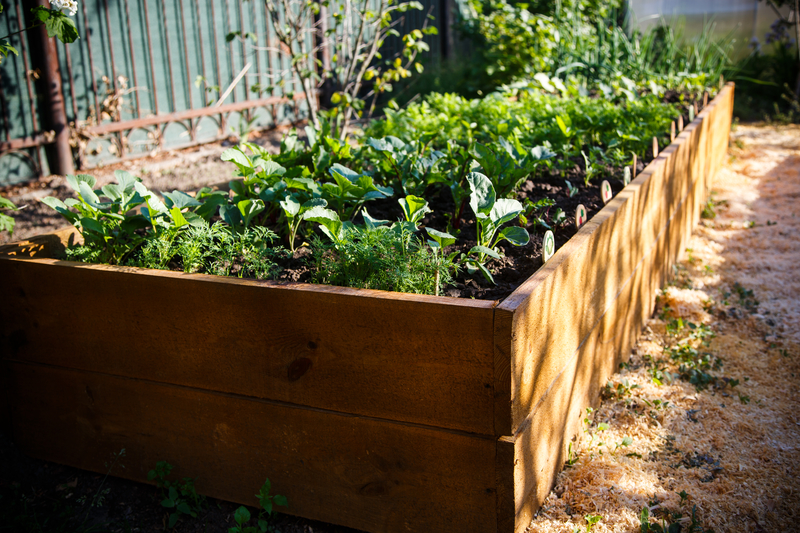
Now it’s time to plant your vegetables and watch them grow. You can plant different vegetables in each square-foot section. Plant vegetables that climb, such as cucumbers, next to the trellis. Put garden markers in each section so you remember what you planted there. Even though you installed weed barrier, you may need still need to weed your garden periodically.
References:
https://www.lowes.com/projects/gardening-and-outdoor/how-to-build-a-raised-garden-bed/project
https://www.bibralakesoils.com.au/winter-planting/
https://www.wikihow.com/Build-Raised-Vegetable-Garden-Boxes